The PGP Decryption Add-On for SFTP Gateway on Azure
One of SFTP Gateway’s greatest advantages is its versatility. Through the use of add-ons and custom solutions, the functionality of SFTP Gateway can be expanded to make tasks more efficient and user-friendly.
For instance, the PGP Decryption add-on automates the process of decrypting PGP encrypted files using a Function App.
In this article, you will deploy the PGP Decryption add-on for SFTP Gateway on Azure. This add-on will automatically decrypt PGP encrypted files as they are uploaded to Blob Storage.
What is PGP?
PGP stands for Pretty Good Privacy, and is commonly used to encrypt email and files. PGP uses public-key cryptography — public keys are used to encrypt, while private keys are used to decrypt.
There are multiple implementations of the OpenPGP standard, one of which is GnuPG, or GPG for short. The PGP Decryption Add-On for SFTP Gateway uses a private key to automatically decrypt incoming files.
Requirements
Before starting, double-check that you have the following:
- git installed
- Docker installed
- A Docker Hub account
- An Azure account that can:
- Create a Resource Group
- Create a Storage Account
- Create a Function App
Preparing to deploy the PGP Decryption Add-On for SFTP Gateway on Azure
Before setting up the Function App, you’re going to create some resources that you’ll need later, such as a Resource Group, Storage Account, and Containers.
Create a Resource Group
You will need a resource group to contain all of these new resources. If you already have an existing Resource Group which you wish to use, you may skip this step.
- Log into the Azure console
- Go to the Resource Group service
- Click +Create
- Give the new group a name
- Click Review + create and then click Create
Create a Storage Account
Now that you have a Resource Group, you need to create a Storage Account inside of it. If you already have an existing Storage Account which you wish to use, you may skip this step.
- Go to the Storage Account service
- Click +Create
- Select the Resource Group you made in the previous step
- Give the new Storage Account a name
- Click Review and then click Create
Create Containers
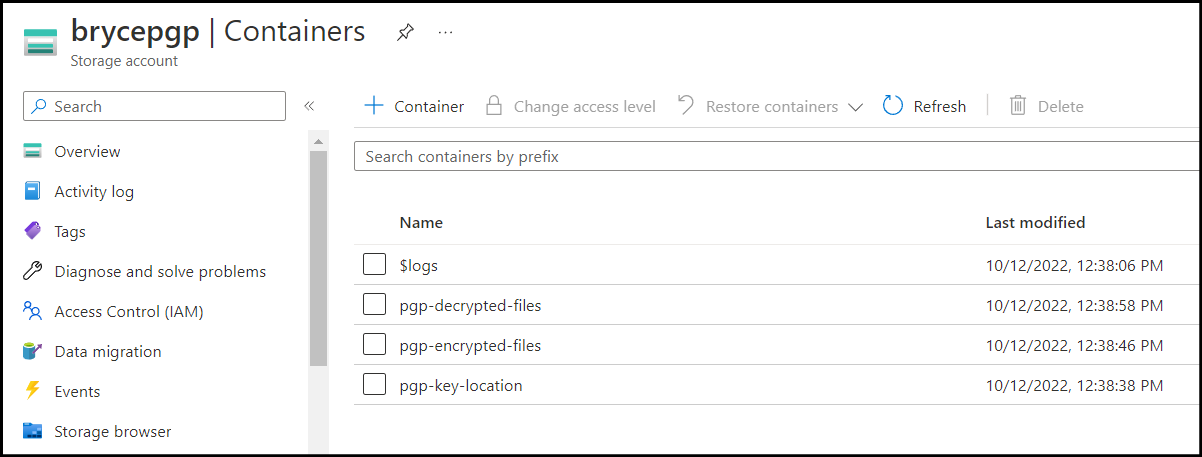
The Function App needs to decrypt Blob objects using a private key. In order to keep these files organized, you will create three containers:
- One container will store your PGP private key
- One container will receive incoming PGP encrypted files
- One container serves as a destination for decrypted files
Here is an example of a naming convention for your containers:
- pgp-key-location
- pgp-encrypted-files
- pgp-decrypted-files
To create a new container:
- Open the Storage Account from the prior step
- Select the Containers section
- Click +Container
- Give the new container a name
- Click Create
Build and Push Container Image
Function Apps can execute serverless code, but it can also execute code in a Docker container. Since the PGP add-on uses Python dependency libraries, it requires the Docker container approach.
In this section, you will build the container image, and then push it to Docker Hub.
Log into Docker Hub
Using the Docker CLI, log into Docker from the command line:
docker login --username {USERNAME} --password {PASSWORD}
If successful, you should see the output: Login Succeeded.
Next, you will build the container image.
Build the Container Image
Clone the source repository to your local computer. This can be done by downloading a zip file of the repository, and then unzipping it on your local machine.
From the command line, cd to the downloaded source repository. You should see the src/ and deploy/ folders.
Copy the command below:
docker build -t {ACCOUNT NAME}/{REPO NAME} -f ./src/main/AzureDockerfile ./src/mainMake sure to replace the placeholder values:
- {ACCOUNT NAME}: Your Docker Hub username
- {REPO NAME}: A Docker Hub repository name, which will be created it if it doesn’t already exist.
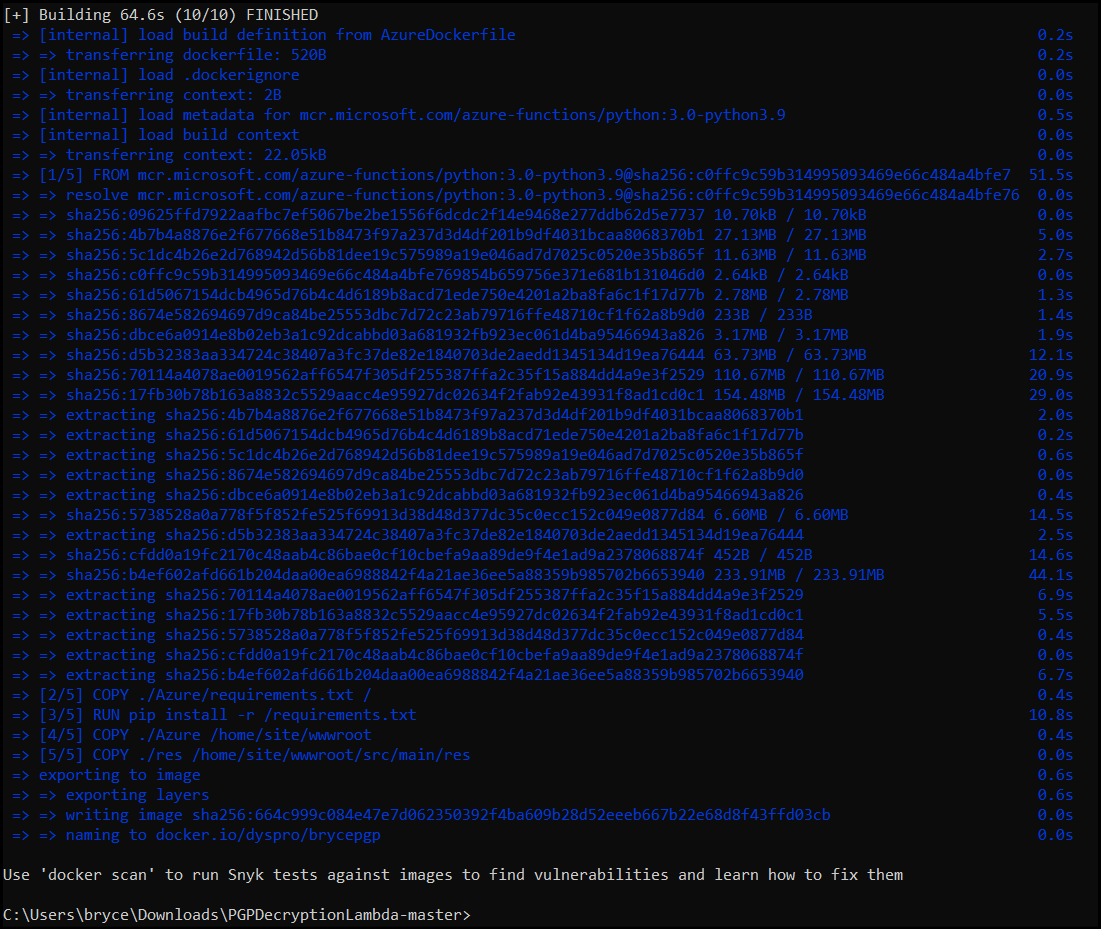
For example, your command might look like this:
docker build -t dyspro/brycepgp -f ./src/main/AzureDockerfile ./src/mainRun the command. You should see multiple lines of output, tracking the download status of Python dependencies.
Push the Container to Docker Hub
Next, run this command (again, replace the placeholder values):
docker push {ACCOUNT NAME}/{REPO NAME}
After this completes, the image should now be visible in Docker Hub and ready for use in the Function App.
Set up the Function App
All the setup is done, and the container is pushed to Docker, so now it’s time for you to create the Function App.
Create the Function App
- Navigate to the Function App service
- Click +Create
- Select the Resource Group you made earlier
- Give the Function App a name
- Under Instance Details select the Docker Container option
- Click Review + create and then click Create
After a minute, the Function App should be created.
Configure Application Settings
The Function App needs to be aware of your Storage Account Containers and how to access them. In this section, you will configure these as Application Settings.
The first Application Setting you will configure is the Storage Account Connection String. Follow these steps to get this information:
- Open the Storage Account you created earlier
- Under the Security + networking section, select Access Keys
- Under key1, click Show next to the Connection String
- Click Copy to clipboard
To set this Application Setting:
- Go back to the Function App
- Under the Settings section, select Configuration
- Click +New application setting
- Set the Name to AZURE_STORAGE_CONNECTION_STRING
- Set the Value to the Storage Account Connection String
- Click OK
Repeat this process for each of the following Application Settings:
- AZURE_STORAGE_CONNECTION_STRING – You already configured the Storage Account Connection String in the prior step
- PGP_KEY_LOCATION – Name of the Blob Storage Container which contains the encryption key file
- PGP_KEY_NAME – File-path to the private key file (including folders). For example: a file named private.asc in a folder named keyfolder would require PGP_KEY_NAME to be set to “keyfolder/private.asc”.
- PGP_PASSPHRASE (optional) – Passphrase associated with the encryption key; you can ignore this variable if you don’t have a passphrase set on your key.
- ENCRYPTED_SOURCE_LOCATION – Name of Blob Storage Container where encrypted files are to be uploaded.
- DECRYPTED_DONE_LOCATION – Name of Blob Storage Container where decrypted files should be moved to after decryption.
When finished, remember to click Save at the top of the screen.
Next, you will point the Function App to the container image you pushed to Docker Hub. But in order to do this, you need the IMAGE ID of your Docker repository. Run the following command:
docker image list
You will see a table that includes your IMAGE ID. For example:
REPOSITORY          TAG    IMAGE ID     CREATED     SIZE
robthorntech/robpgp latest 1234567789ab 2 hours ago 1.68GB
To point your Function App to this container image, do the following:
- Under the Deployment section, select Deployment Center
- Under Registry Settings, change the Registry source to Docker Hub
- Enter the IMAGE ID and tag in the Full Image Name and Tag field. For example: 123456789ab:latest
- Press Save
Click on the Logs tab. You should see log output of the Function App pulling and downloading your container image.
Testing the Function App
You should now have a fully functioning Function App which automatically decrypts PGP encrypted files.
To test your Function App, upload your PGP private key to the container and path you specified in the previous section.
Next, drop an encrypted file (with a .pgp or .gpg file extension) in the container for incoming encrypted files.
Finally, check the container that you designated for decrypted files. You should see a decrypted file without the .gpg file extension.
To see a demonstration of this, check out this YouTube video.
Troubleshooting
The PGP add-on uses gpg v2.2.x, which is the currently available version for our Python dependencies.
If you generated a private key using gpg v2.3.x, this will not work with our PGP add-on. This is because v2.3 private keys cannot be used with v2.2.
If you are running into this issue, the best option is to downgrade your PGP version to v2.2.x, and generate a new private key using that version.


