
Setting up Facebook login and user data storage in your app with AWS Mobile Hub is really easy.
Amazon Web Services’ Mobile Hub is a great way to quickly add features to your mobile application.
Mobile Hub can integrate many different features. It generates a base app for you, and all the features you choose to add will already be set up and ready to use. By taking care of boiler-plate code, Mobile Hub frees you up to focus on the business portion of your app.
AWS provides generous free limits. And Mobile Hub is a great Parse replacement for those transitioning off that platform.
This tutorial covers how to add two common features:
- User sign-in
- User data storage
Setting up Facebook login with AWS Mobile Hub
Facebook login is a popular choice for mobile. Users don’t need to remember yet another username and password. And OAuth helps confirm the user’s identity, so you don’t have to wait for the user to verify their email address.
Before you use Facebook login, you need to generate a Facebook App ID for your app.
To generate an App ID:
1. Navigate to https://developers.facebook.com/quickstarts and select your platform. Create an account if necessary.

2. On the next page, Click Skip and Create App ID.
3. Set name of app, contact email and app category, then click Create App ID.

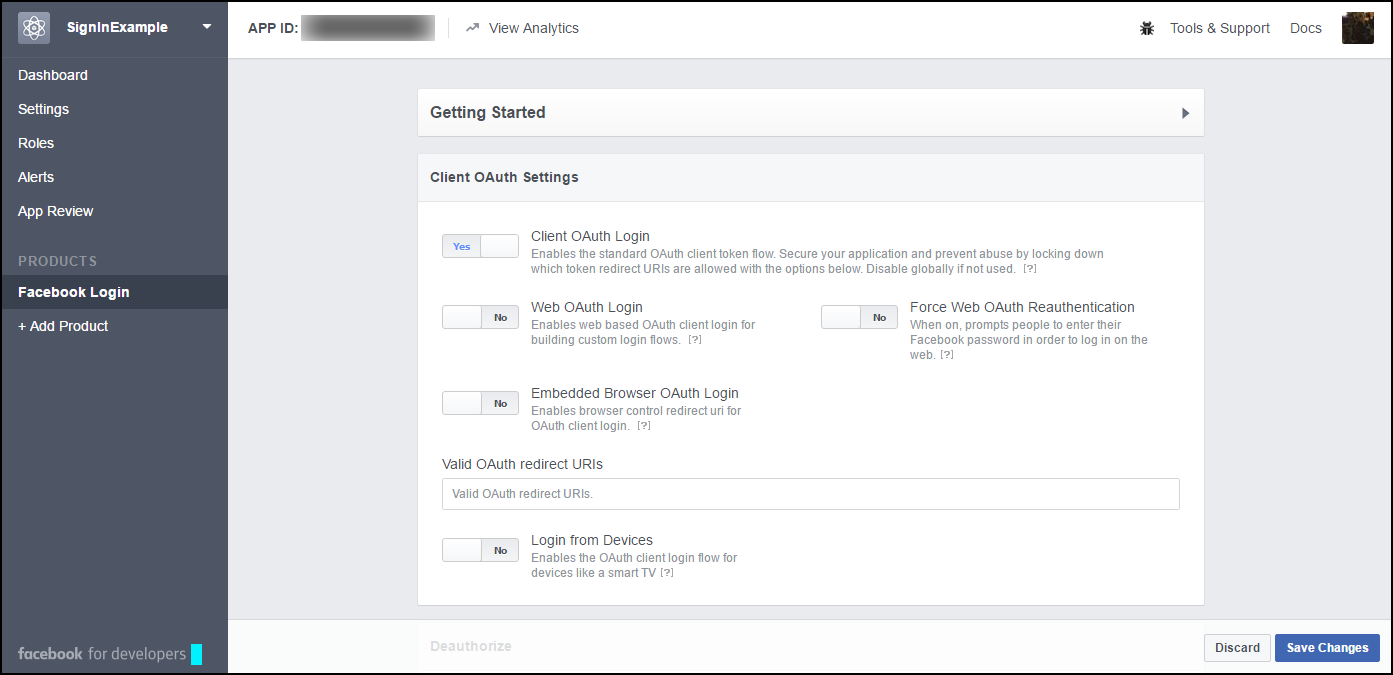
4. On the Product Setup page, Click Get Started next to Facebook Login.
5. In the Facebook Login settings, disable Web OAuth Login. Click Save Settings.
6. For now Facebook login will only work with the account you generated this app ID with. If you want it to work with any Facebook user, you must set this Facebook app to public.
To do this, go to https://developers.facebook.com/apps and select your app. Click App Review on the left, and set the first option to On.

The Facebook Login setup is now complete. Note the App ID in the upper left corner.
2) Set up user login for Mobile Hub
The next step is to set up user login for AWS Mobile Hub and connect the Facebook user login you just created.
1. Navigate to https://aws.amazon.com/ and sign in. Create an AWS account if necessary.
2. On the AWS dashboard, under Mobile Services, click Mobile Hub.

3. Click Get Started, and if an alert appears, click Yes, grant permissions.
Be warned, by clicking yes you are giving your app the permission to use AWS resources. This means if you go over the free limits for any Amazon services, your credit card will be charged. You can keep track of your limits at https://console.aws.amazon.com/billing.

4. Name your project. For this example, I chose SignInExample. Click Create Project.
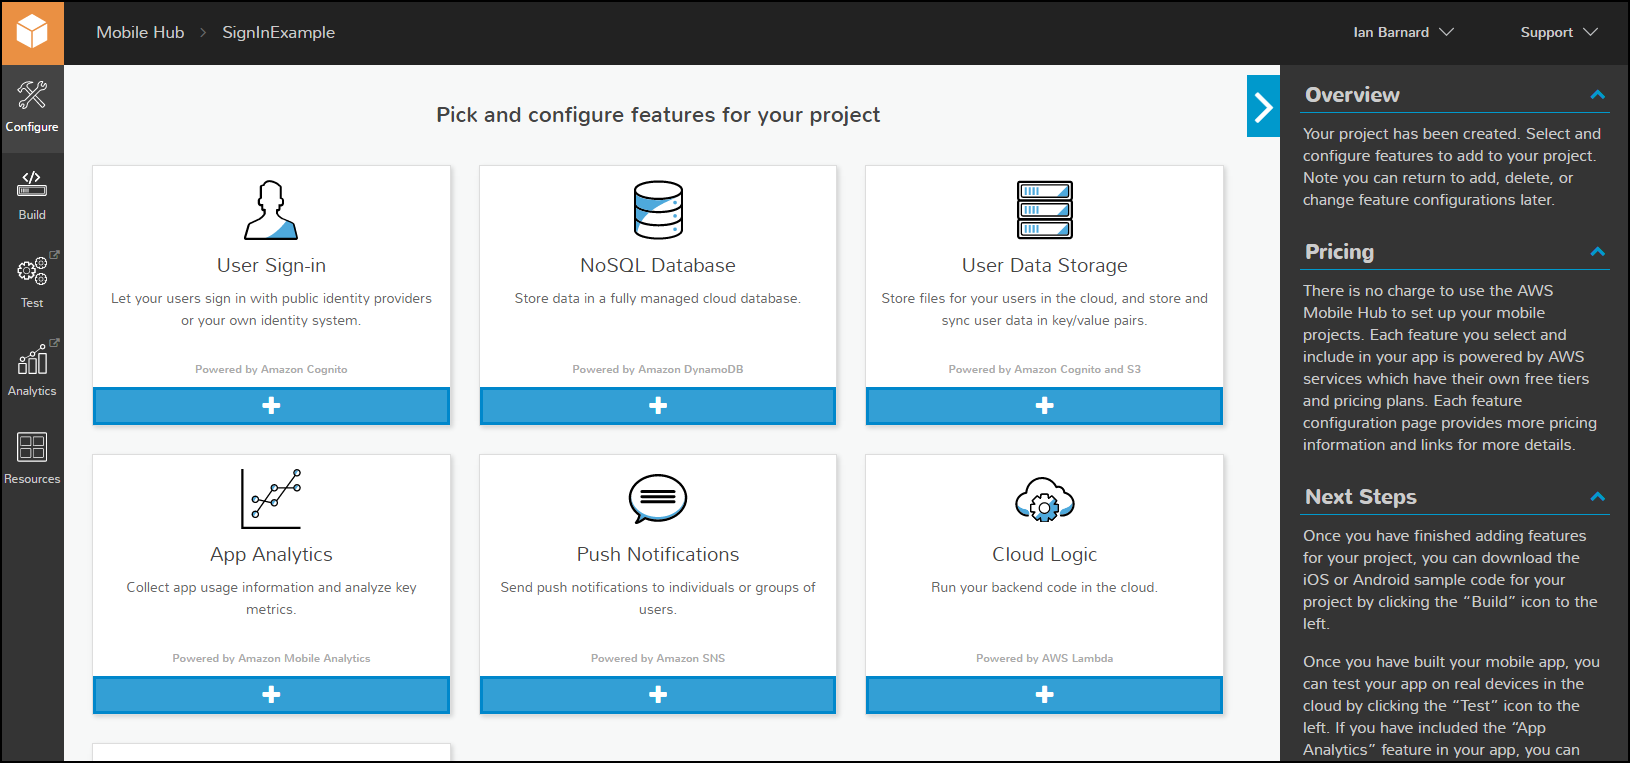
5. The base project has been created. In order to give this app user sign-in and data storage, you have to configure those features. Click User Sign-in.
6. If you want to give users the choice to sign in to your app, click Sign-in is optional. If you want sign-in to be a requirement, click Sign-in is required.
7. Under “How can users sign in?” click Facebook. Paste the App ID that was generated in the first section of this tutorial. Click Save changes, then Configure more features.

8. Now that sign-in is configured, you need to configure user data storage. On the dashboard, click User Data Storage.
9. Adding the data storage feature is as simple as clicking Store user data, then Save changes.
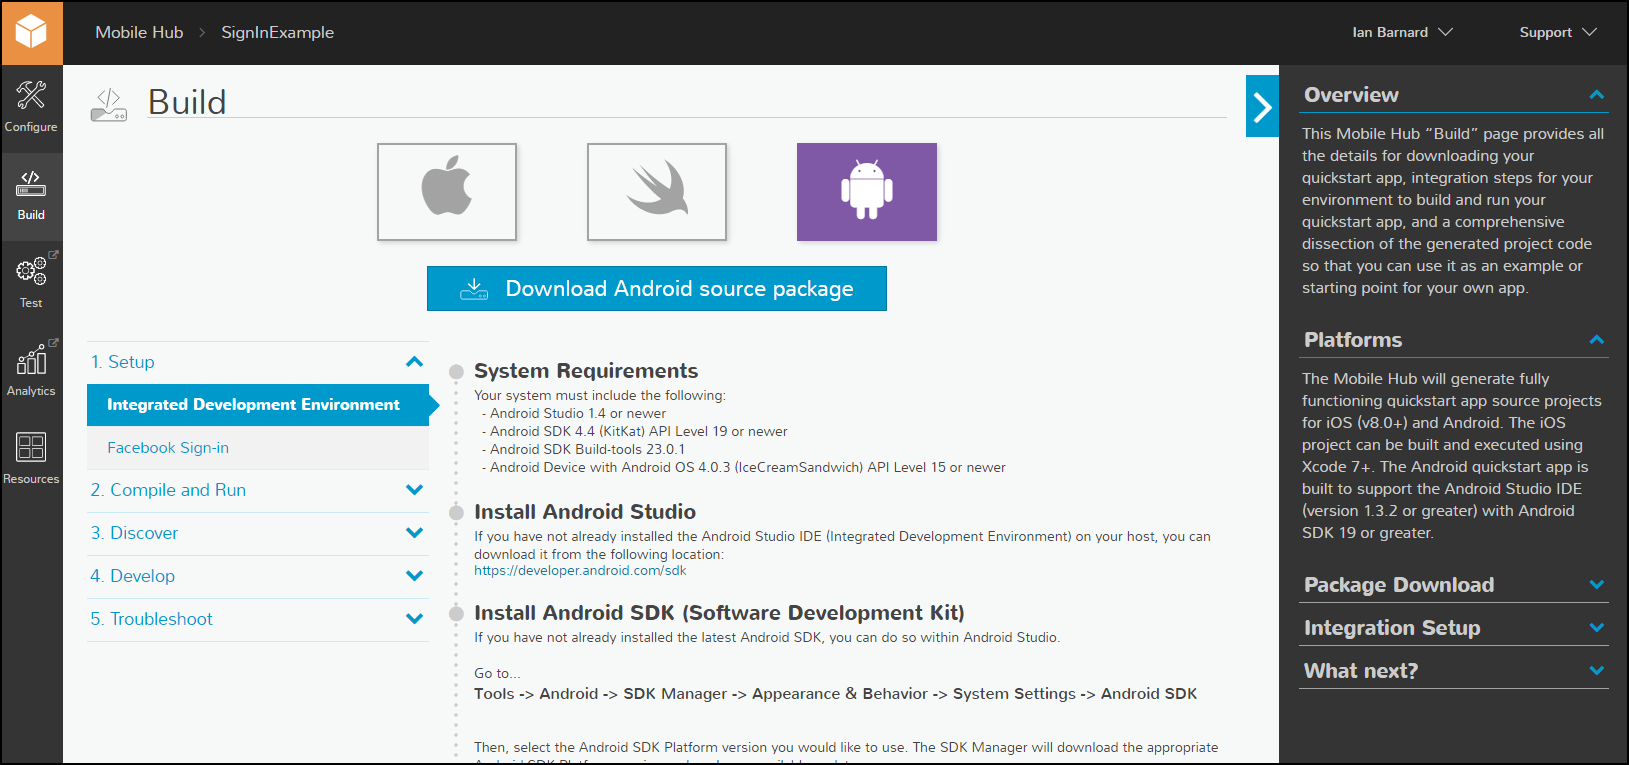
10. To finish building the app, click Build your app.

11. On the next screen, choose the platform you want to use (iOS, Android, etc.). Be sure that this matches the platform you chose during the Facebook setup.
Click Download source package when the package is ready.
12. Unzip the downloaded file, and extract the MySampleApp folder.
13. In order to finalize the Facebook sign-in setup, you need to give Facebook a little more information about the app. Navigate to https://developers.facebook.com/apps and select your app. Click Settings on the left.
14. Click Add Platform.

At this point, if you’re developing for Android, jump to step 16. If you’re working on an iOS app, read step 15.
15. Select iOS as the platform. Under Bundle ID, type com.amazon.MySampleApp. Click Save Changes. You’re done! Click here to skip the remaining steps for Android and jump to the end of this section.

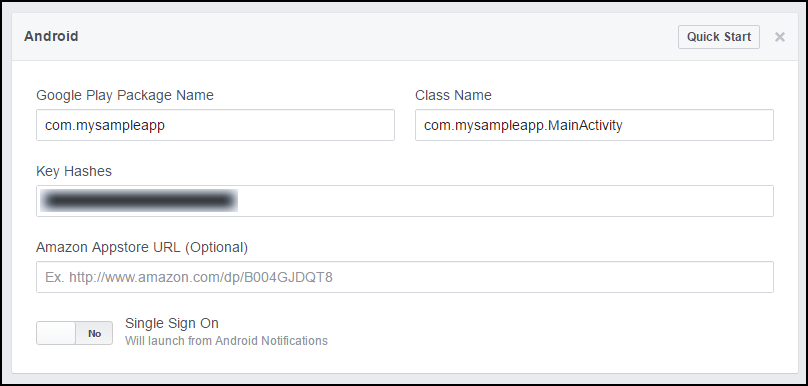
16. If you’re developing for Android, select Android as the platform. Under Google Play Package Name, type com.mysampleapp. Under Class Name, type com.mysampleapp.MainActivity.
After clicking Save Changes, an alert will appear. As long as you haven’t publicly listed your app on the Google Play Store, you can click Use this package name.

17. With Android, a key hash is also necessary. Import the downloaded folder (MySampleApp) into Android Studio. When the project is finished importing, open the terminal in Android Studio.
On a Mac, issue the command keytool -exportcert -alias androiddebugkey -keystore ~/.android/debug.keystore | openssl sha1 -binary | openssl base64
On Windows, issue the command keytool -exportcert -alias androiddebugkey -keystore %HOMEPATH%.androiddebug.keystore | openssl sha1 -binary | openssl base64
18. If prompted for a keystore password, hit Return. The app’s key hash will be printed to the terminal. Copy this and enter it under Key Hashes. Click Save Changes .
The base app is now complete. The app downloaded from Mobile Hub has Facebook login and user data storage already integrated, and even includes in-app demonstrations for these features. Feel free to build your own app using the generated app as a code base.
If you’re interested in exploring the pre-built demonstrations (for Android), continue to the next section.
Mobile Hub In-App Demos
In order to demonstrate the functionality of included features, Mobile Hub provides pre-built demos within the app.
Sign-in
As soon as the app opens, you will see a Facebook button. Clicking it brings up the Facebook login screen.

After logging in, you will be taken to the app’s home page. If you click the hamburger menu button on the upper left corner, you will see your Facebook name and profile picture. All profile-specific data will be passed to another device if you log in to the same account on another device!

Data Storage
In order to show how user data storage works, AWS Mobile Hub includes two demonstrations.
The first demo is a simple theme selector.
From the home page, click User Data Storage, then Demo User Profile Data. The next screen has 4 buttons, and clicking on one will change the app’s theme colors.

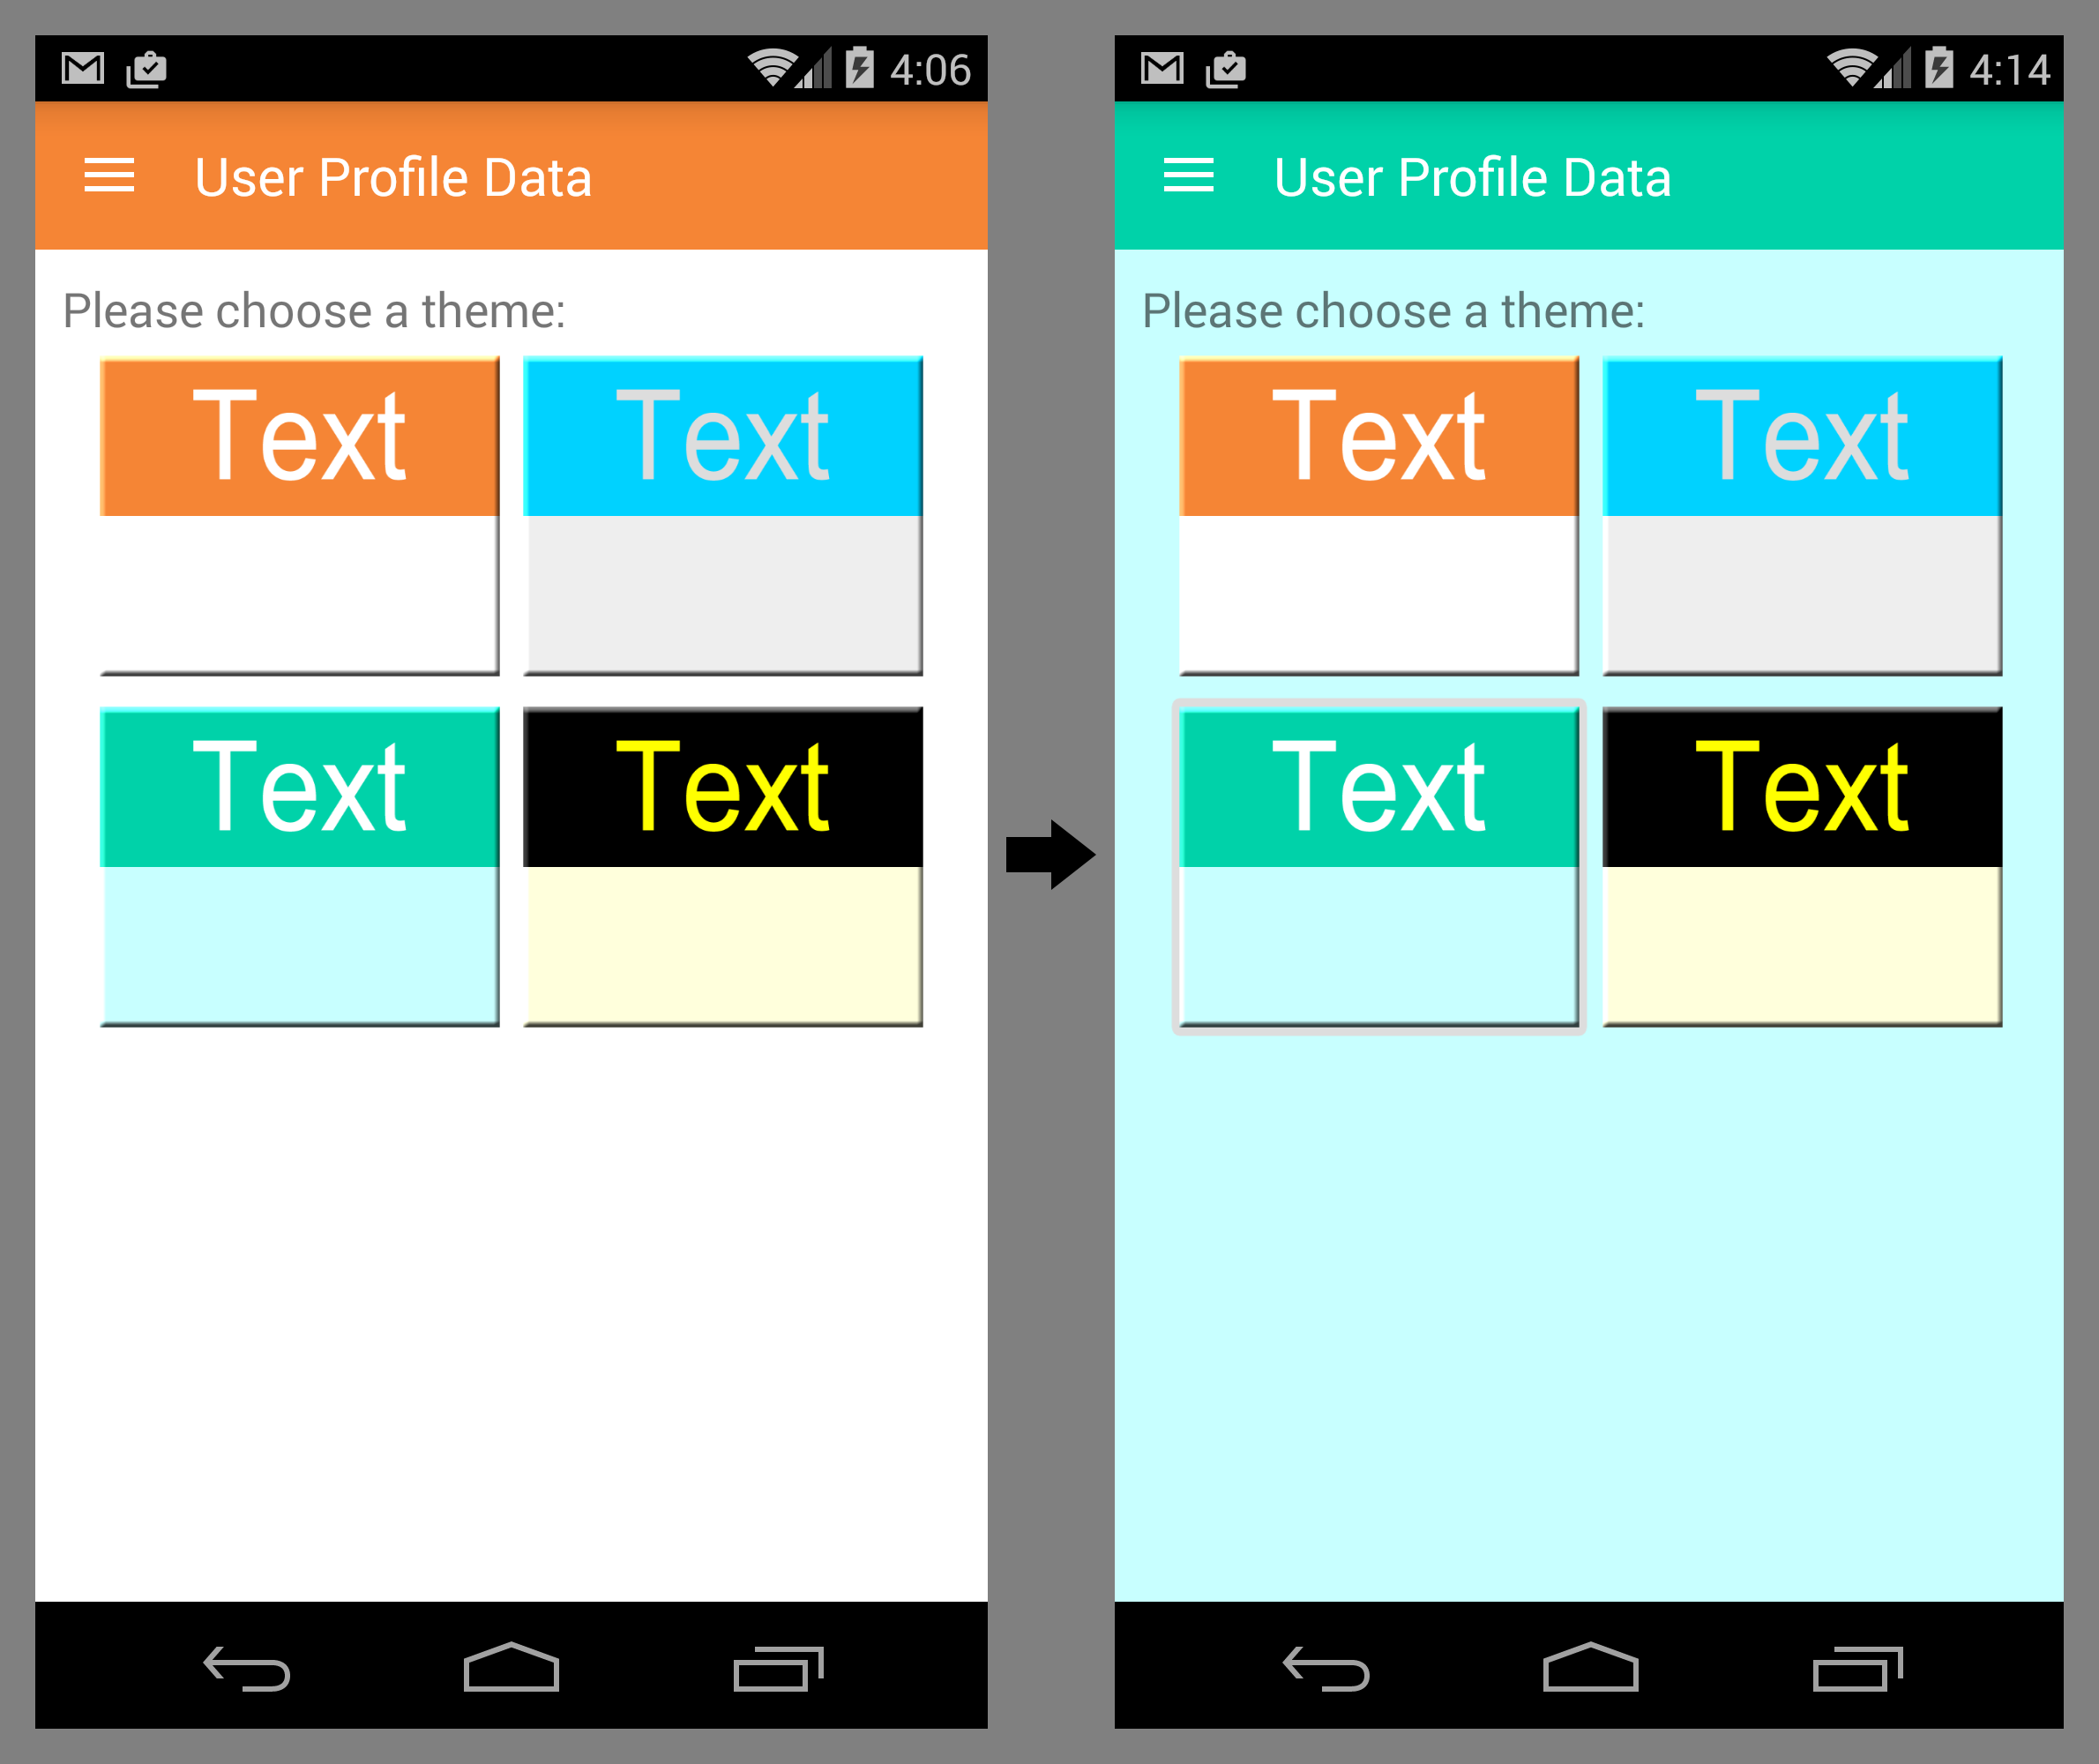
If you sign in to the same profile on a different device, you’ll find that the theme is changed on that device as well.

The second demo is a user file storage app. Users can upload files to a public or private folder.
From the User Data Storage page, click Demo User File Storage. The next screen shows the private and public folders.

Click the Private folder to open it. For now, it’s empty. Click the menu button on the upper right corner. Click Upload to upload a file of your choice.
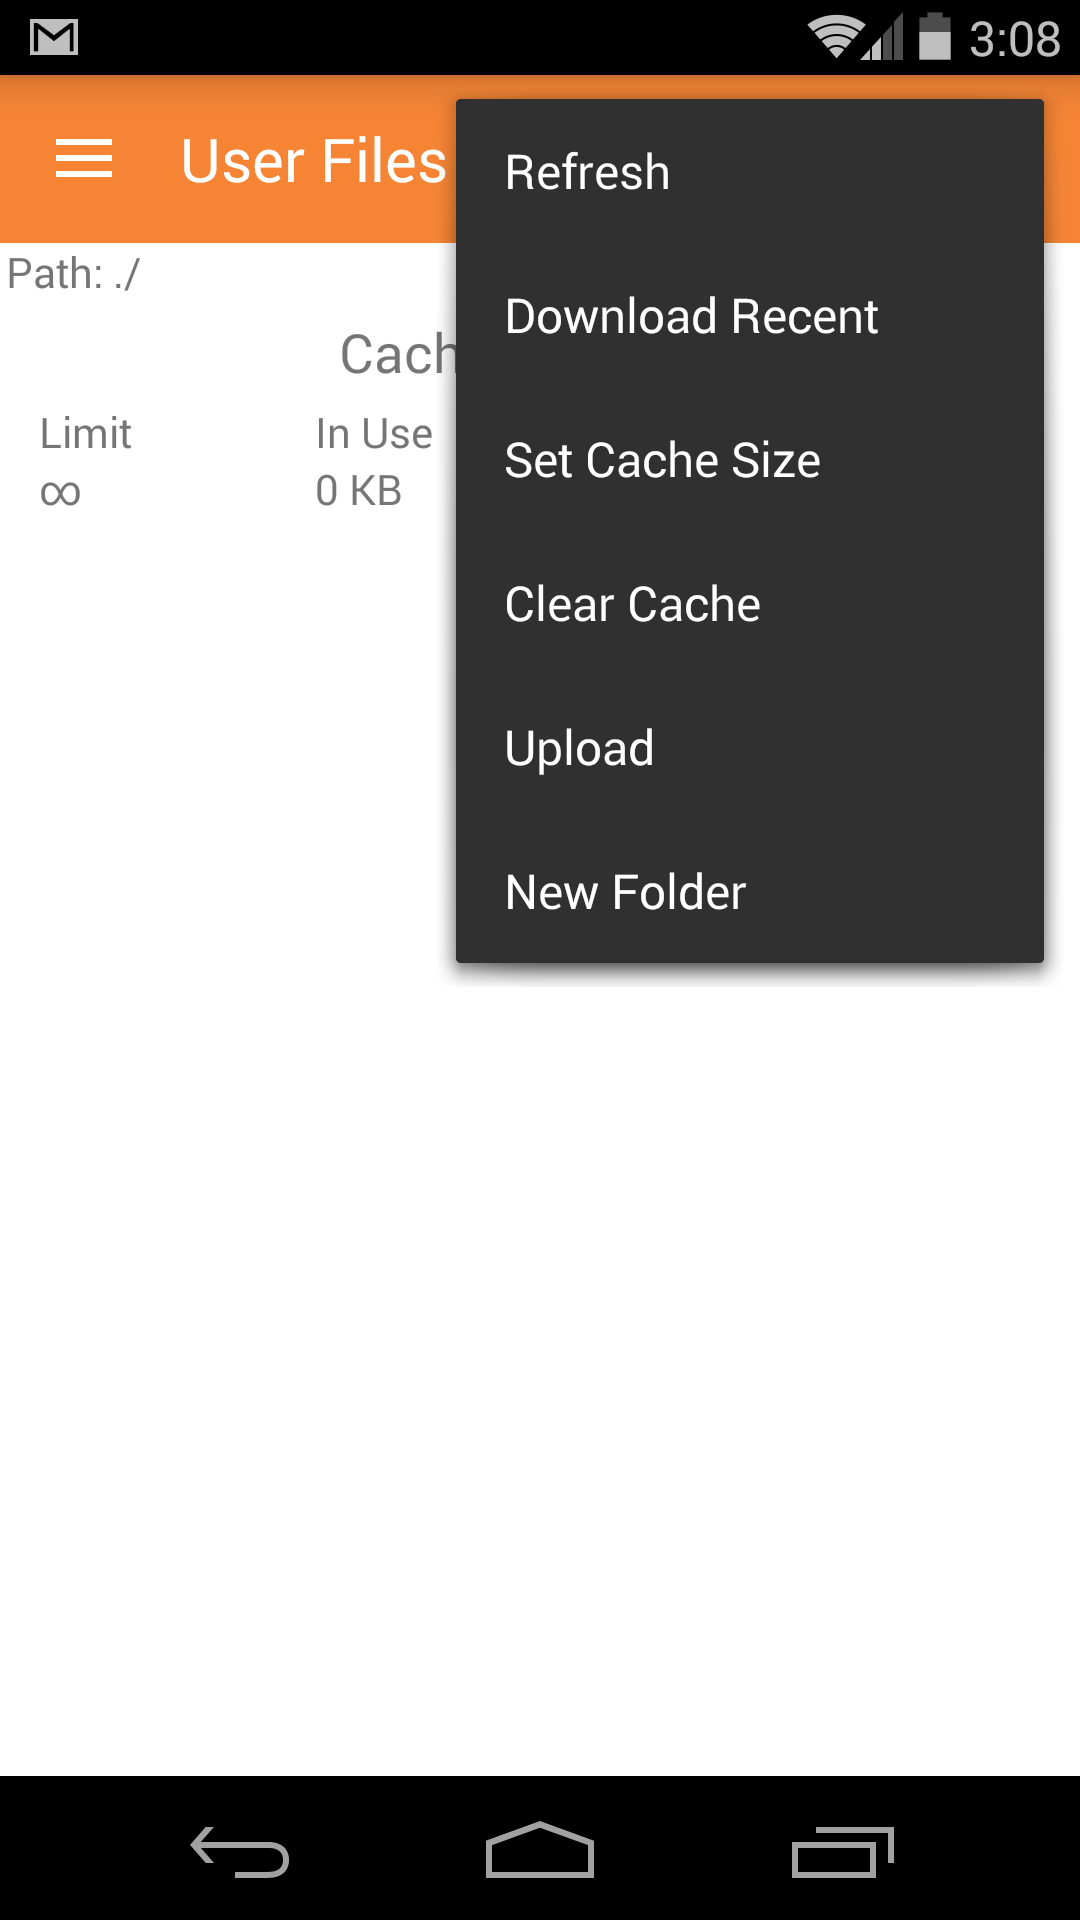
The file will now appear in the Private folder. If you sign in to the same user on a different device, you’ll find that the file you chose is still in that folder. You can download the file if you choose to.

Conclusion
At the end of this tutorial, you should have a base app with working user sign-in and data storage. From here you can modify the code to have the features work in whatever way you please.
You could make a to-do list that uses data storage to carry the list over to another device, a game that uses data storage to save progress, or many other uses. The possibilities are endless!
If you follow this tutorial and make something interesting, leave a comment! We would love to hear from you.
Thank you for reading my tutorial on AWS Mobile Hub. If you have any questions or suggestions, feel free to comment below!
Like this post? Please share it using the share buttons to the left! Then follow us on Twitter – @thorntech – and sign up for our developer mailing list below for future updates.