
In this guide, we’ll walk through how to connect an SFTP server to Azure Data Factory to copy SFTP data to an Azure File Share, allowing you to migrate data seamlessly.
Integrating your SFTP server with Azure Data Factory (ADF) can streamline your workflows by automating data transfers when managing data pipelines in Azure.
Why connect an SFTP server to Azure Data Factory?
SFTP servers are a common way to securely transfer files, often used for batch data imports and exports. With Azure Data Factory’s SFTP connector, you can integrate your SFTP server into your data pipelines, enabling automated processes such as file ingestion, transformation, and storage in Azure services like Blob Storage, Data Lake, or File Shares.
Step-by-Step Guide to Connect an SFTP Server to Azure Data Factory
1. Prepare Your SFTP Server
Before connecting to ADF, ensure that your SFTP server is ready:
- Authentication: Use SSH key authentication or username/password.
- Networking: Ensure the SFTP server is accessible from Azure. Port
22(or your custom SFTP port) should be open in firewalls or network security groups.
2. Set Up Connections to Linked Services in Azure Data Factory
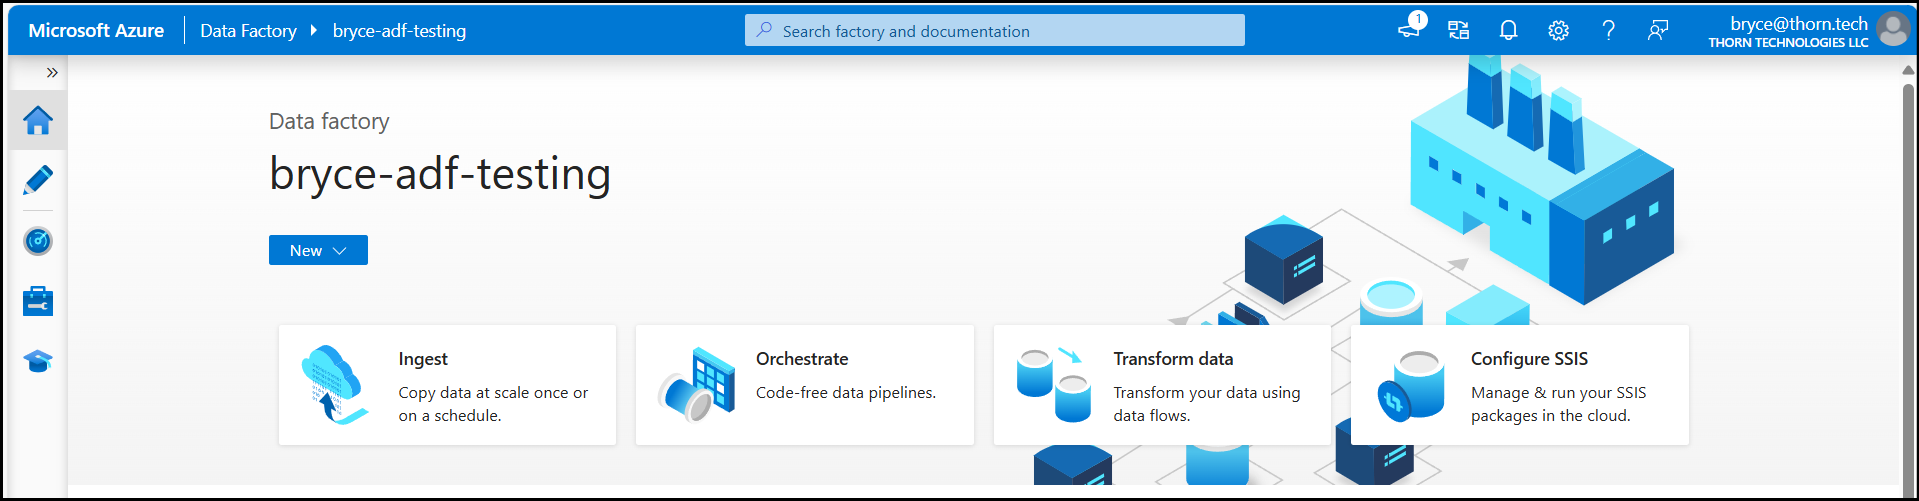
- Log in to the Azure Portal and navigate to your Data Factory instance.

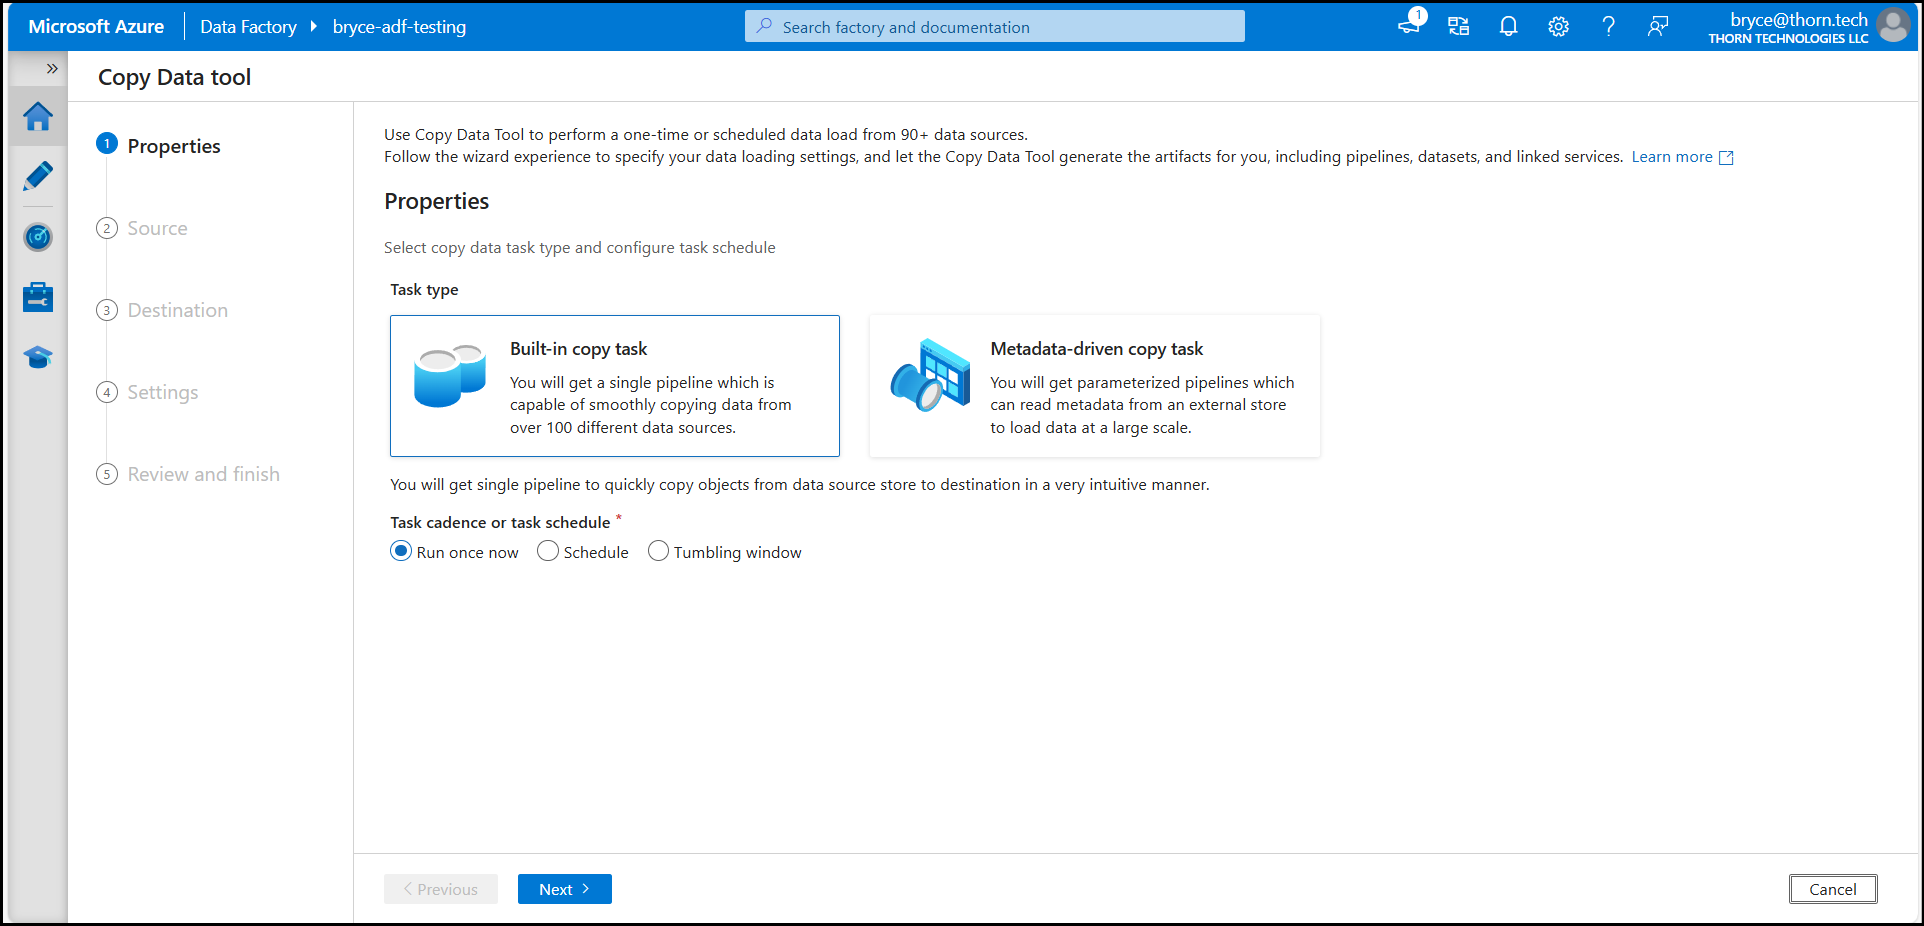
- Click Ingest —> Next, and we’ll keep the default option of a one-time copy to set up connections to our SFTP server and our Azure File Share in one single process.

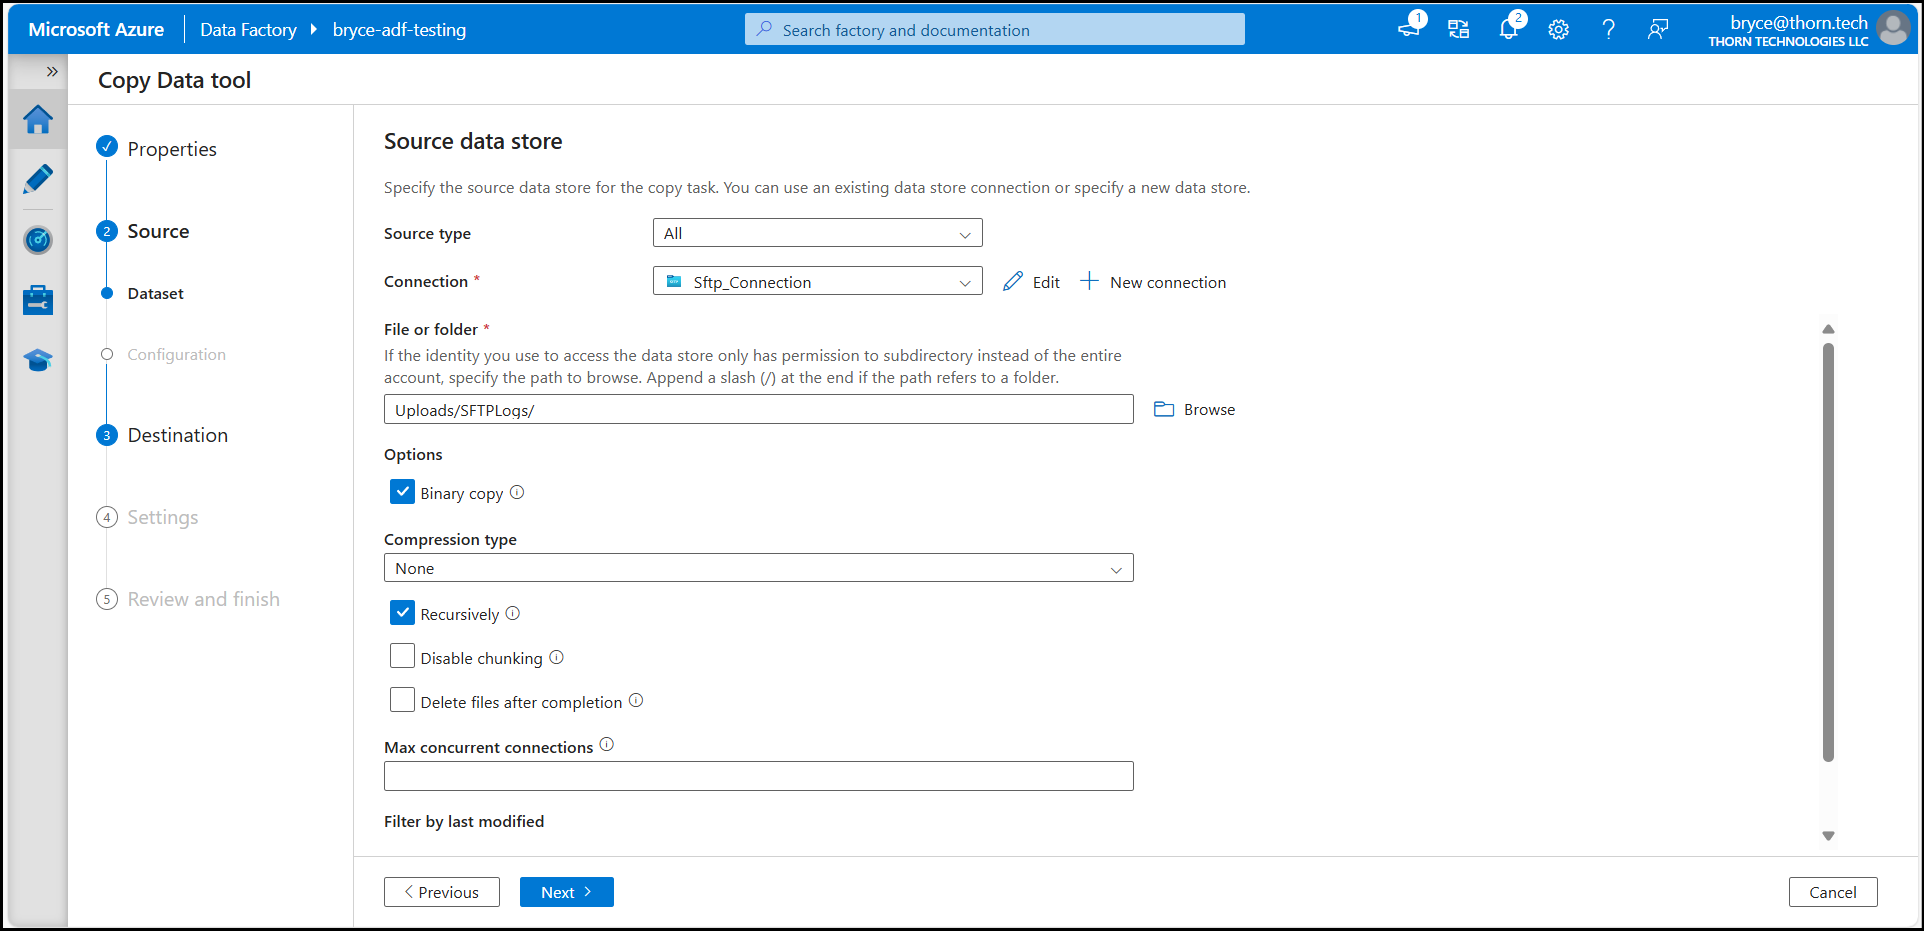
3. Create an SFTP Dataset in ADF
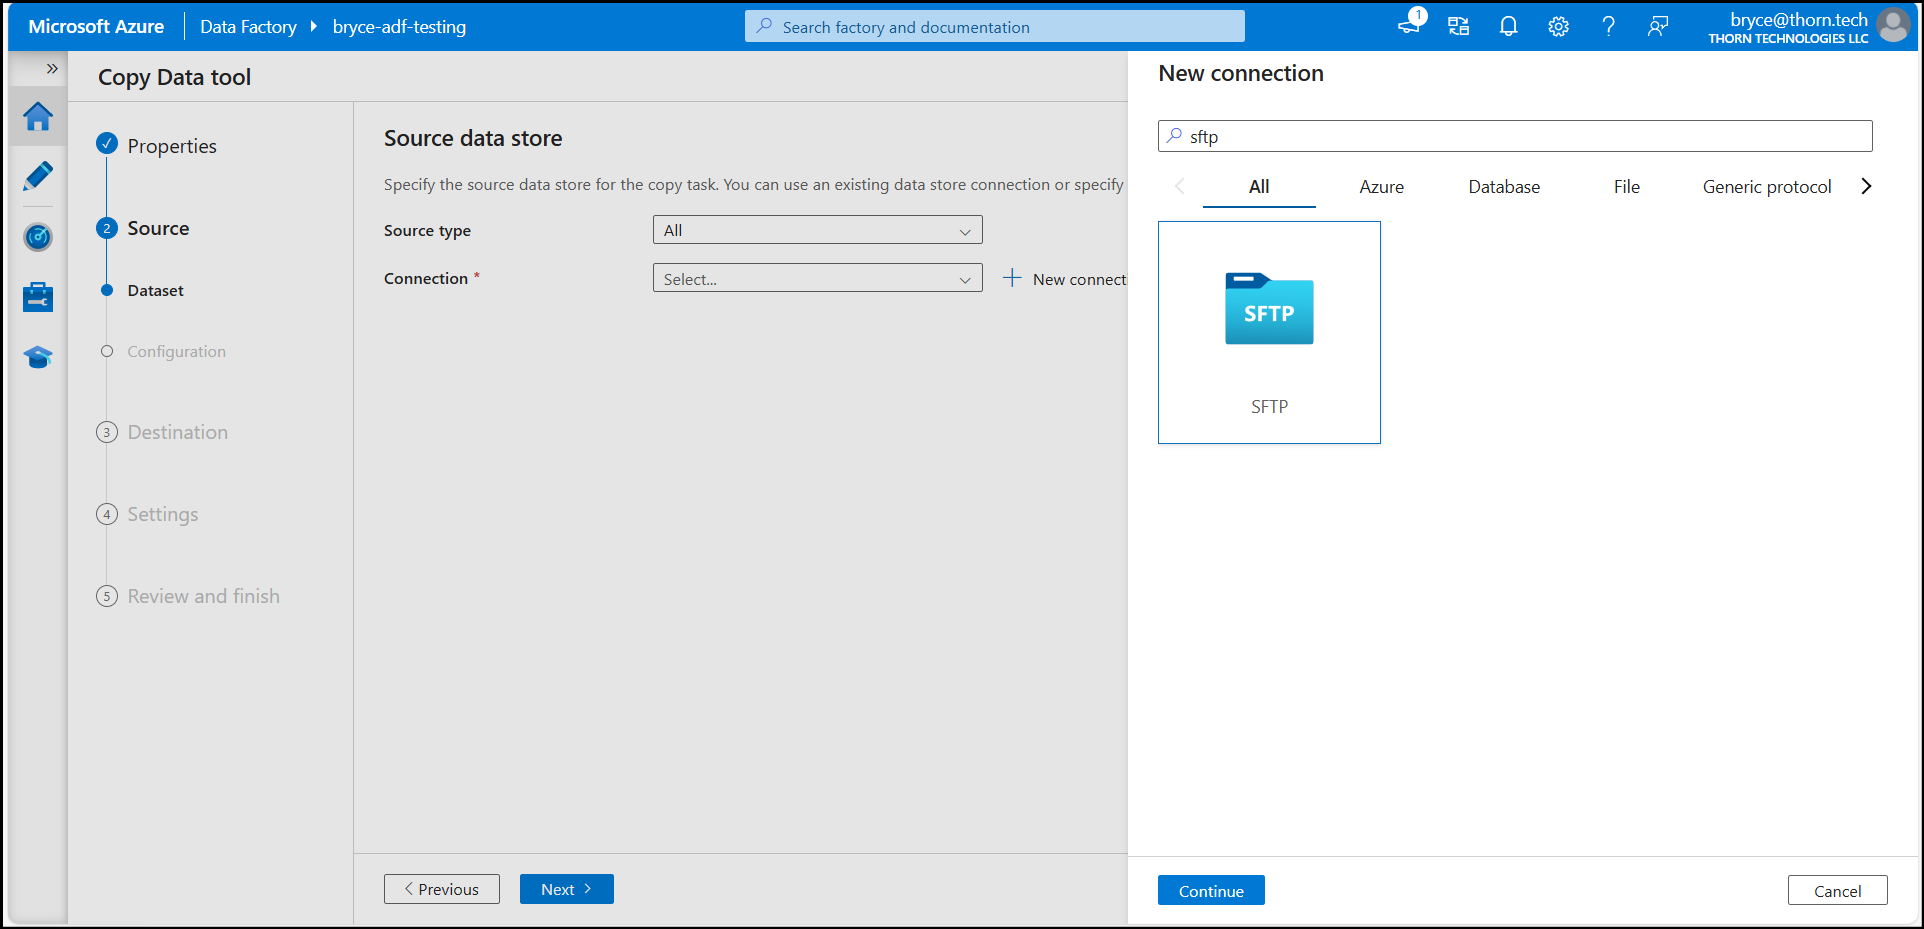
- Under the Source data store, click + New connection, search for SFTP, and select Continue.

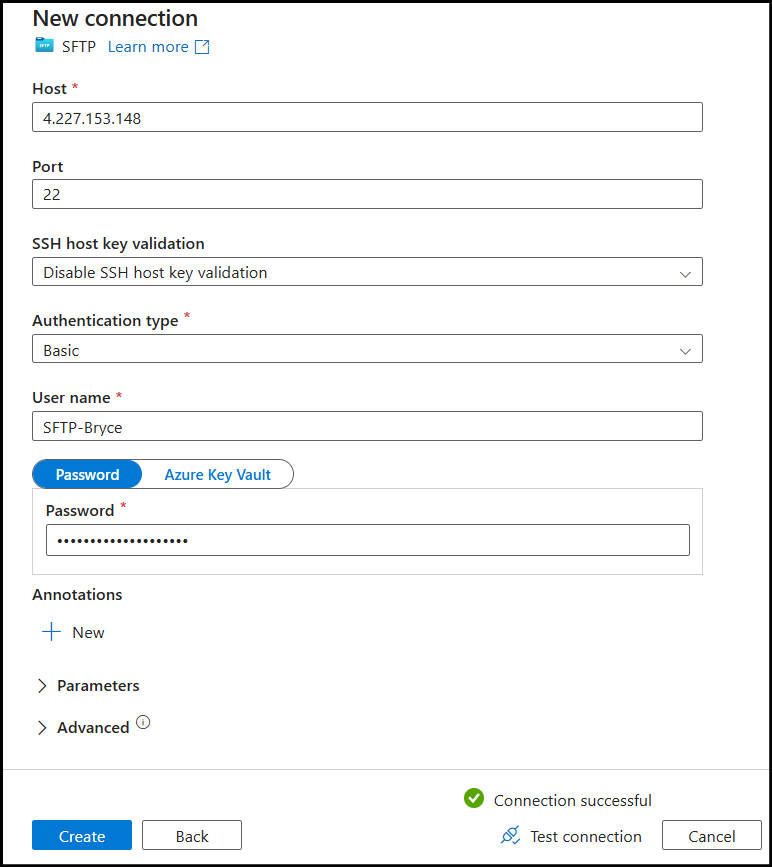
- Fill in the connection details:
- Host: Enter the SFTP server’s hostname or IP address.
- Port: Use port
22unless using a custom port. - Authentication Type: Choose “Basic” (username/password) or “SSH public key authentication.”
- Credentials: Enter the relevant user name, password, or private key.

- Click Test Connection to confirm connectivity and click Create.
- Define the folder path on the SFTP server to copy data from and configure the Options, then click Next.

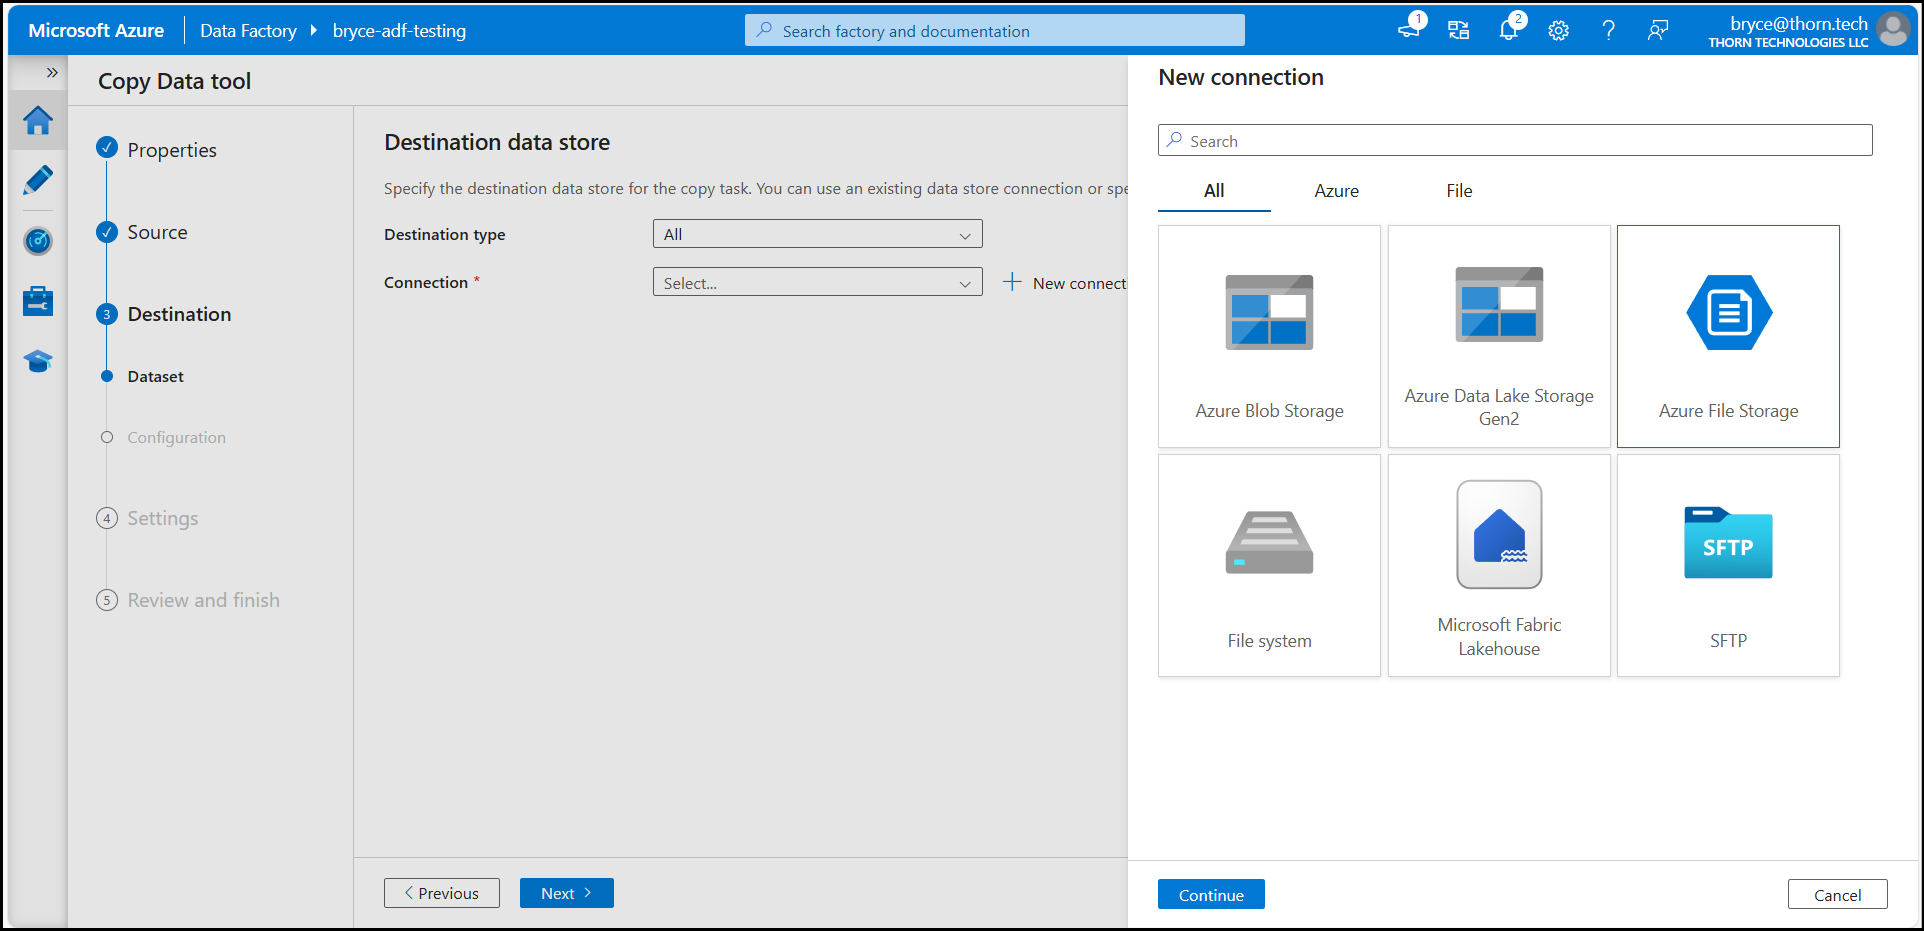
4. Create an Azure File Storage Dataset in ADF
- Under the Destination data store, click + New connection and search for Azure File Storage and select Continue.

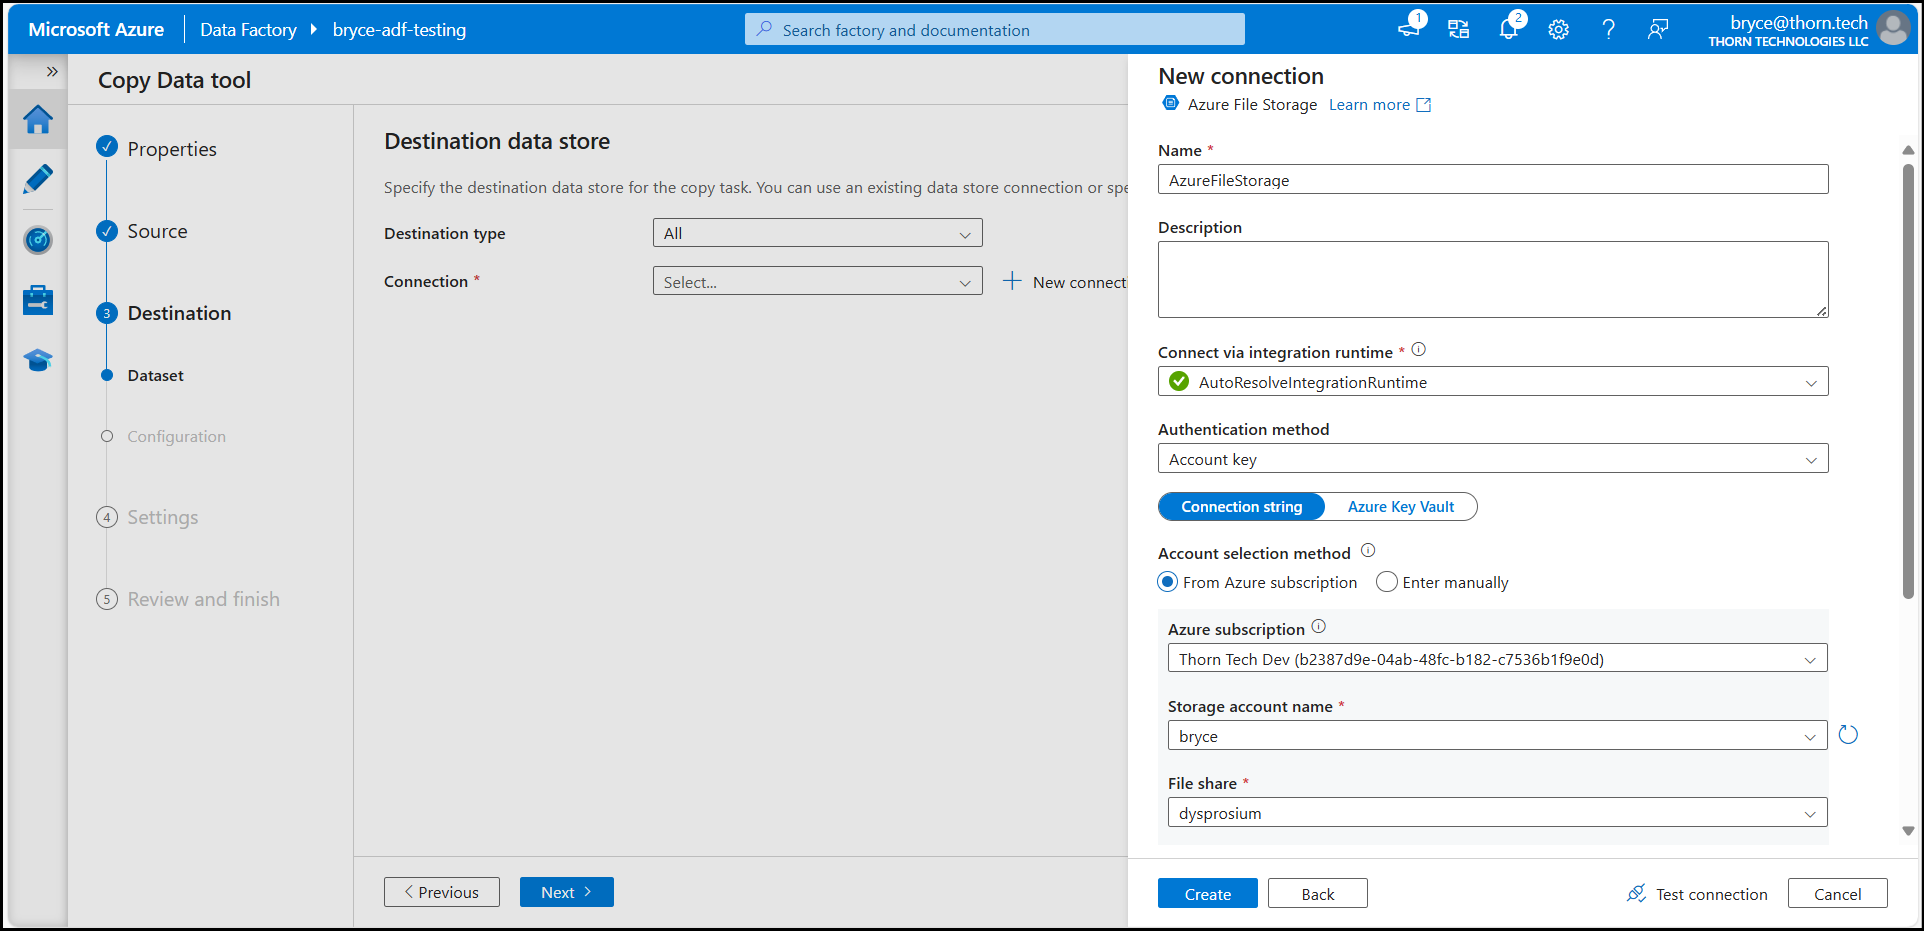
- Fill in the connection details:
- Authentication method: Authentication options include Account key, SAS URI, System-assigned managed identity, User-assigned managed identity or Basic. In my example I will be using the Account key option.
- Azure subscription: Select the subscription in which the File share is located.
- Storage account name: Select the storage account the File share is inside of.
- File share: Select the actual File share you’d like to connect to.

- Click Test Connection to confirm connectivity and click Create.
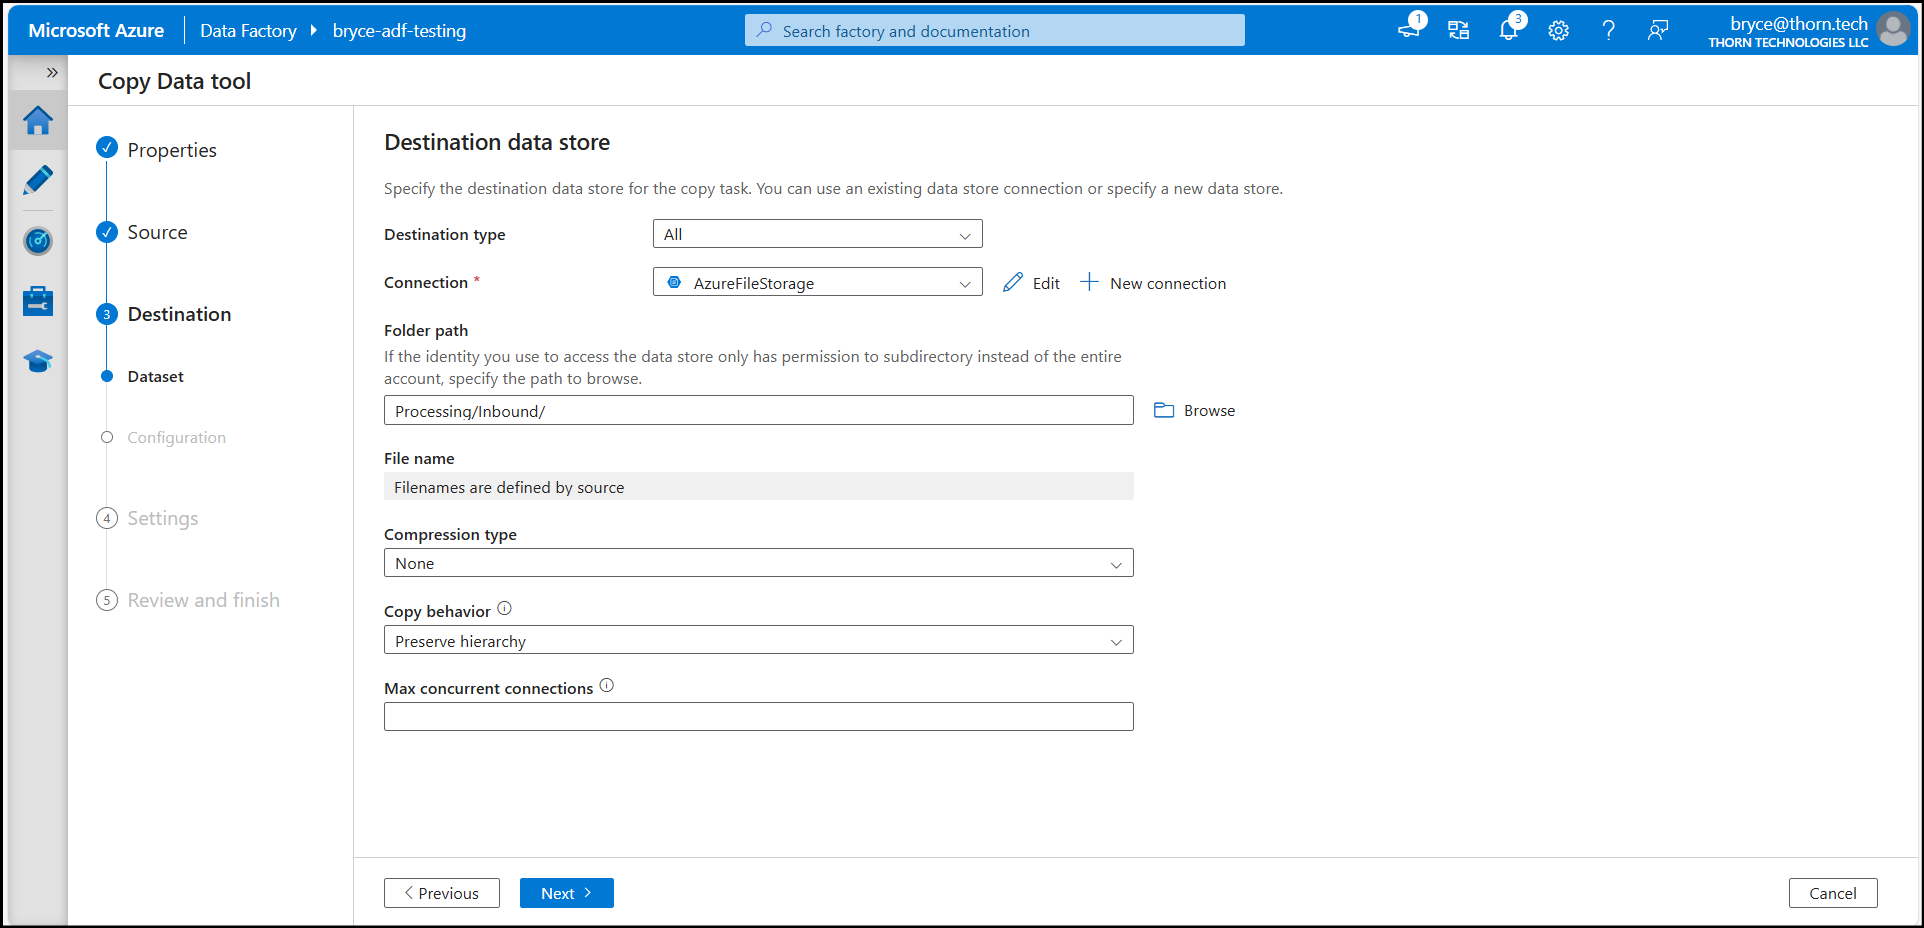
- Define the Folder path on the file share to copy data into and configure the Options, then click Next.

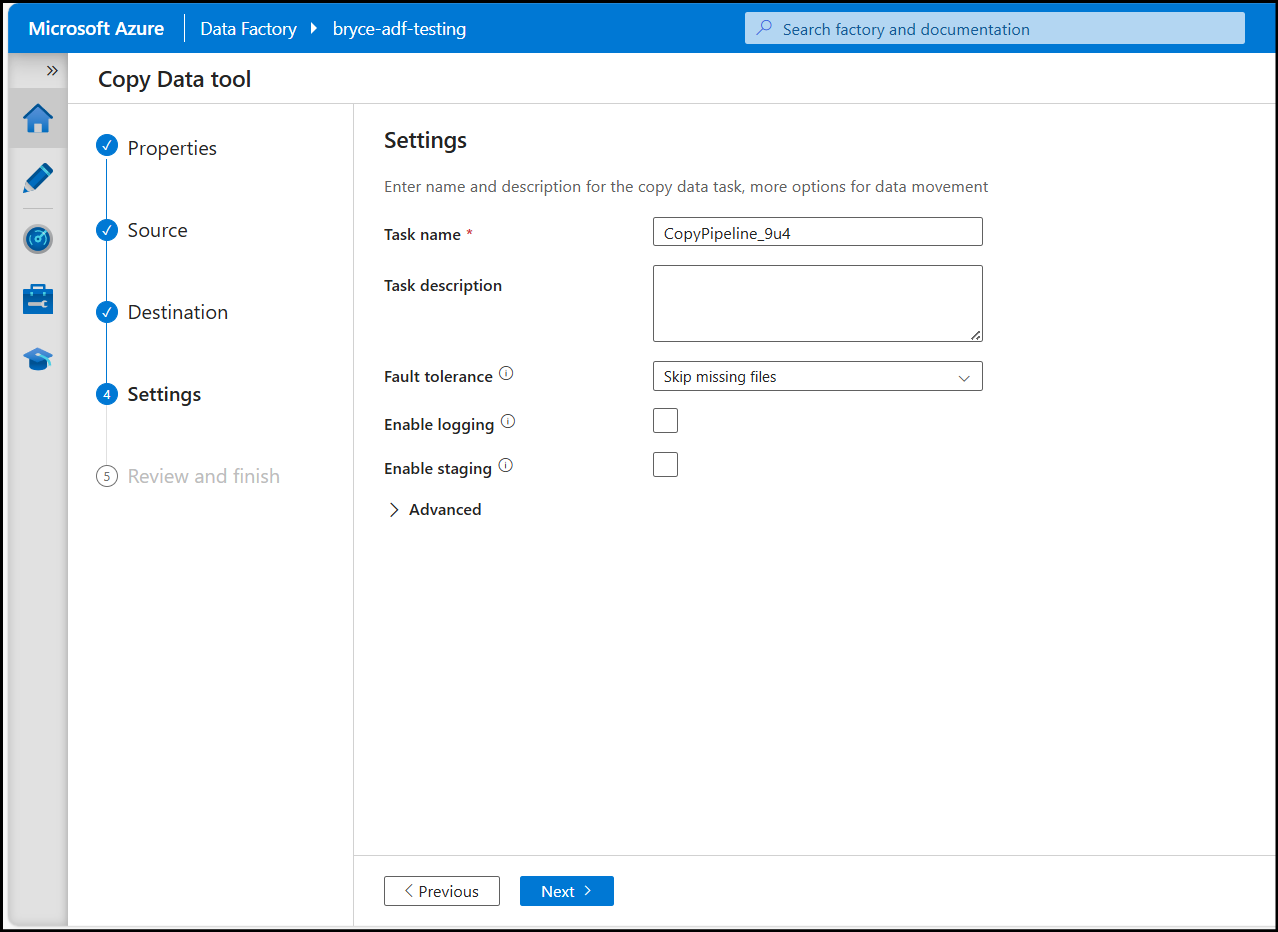
5. Configure any Settings and Copy the Data.
- Configure any applicable settings such as the Task name, logging, staging or fault tolerance and click Next.

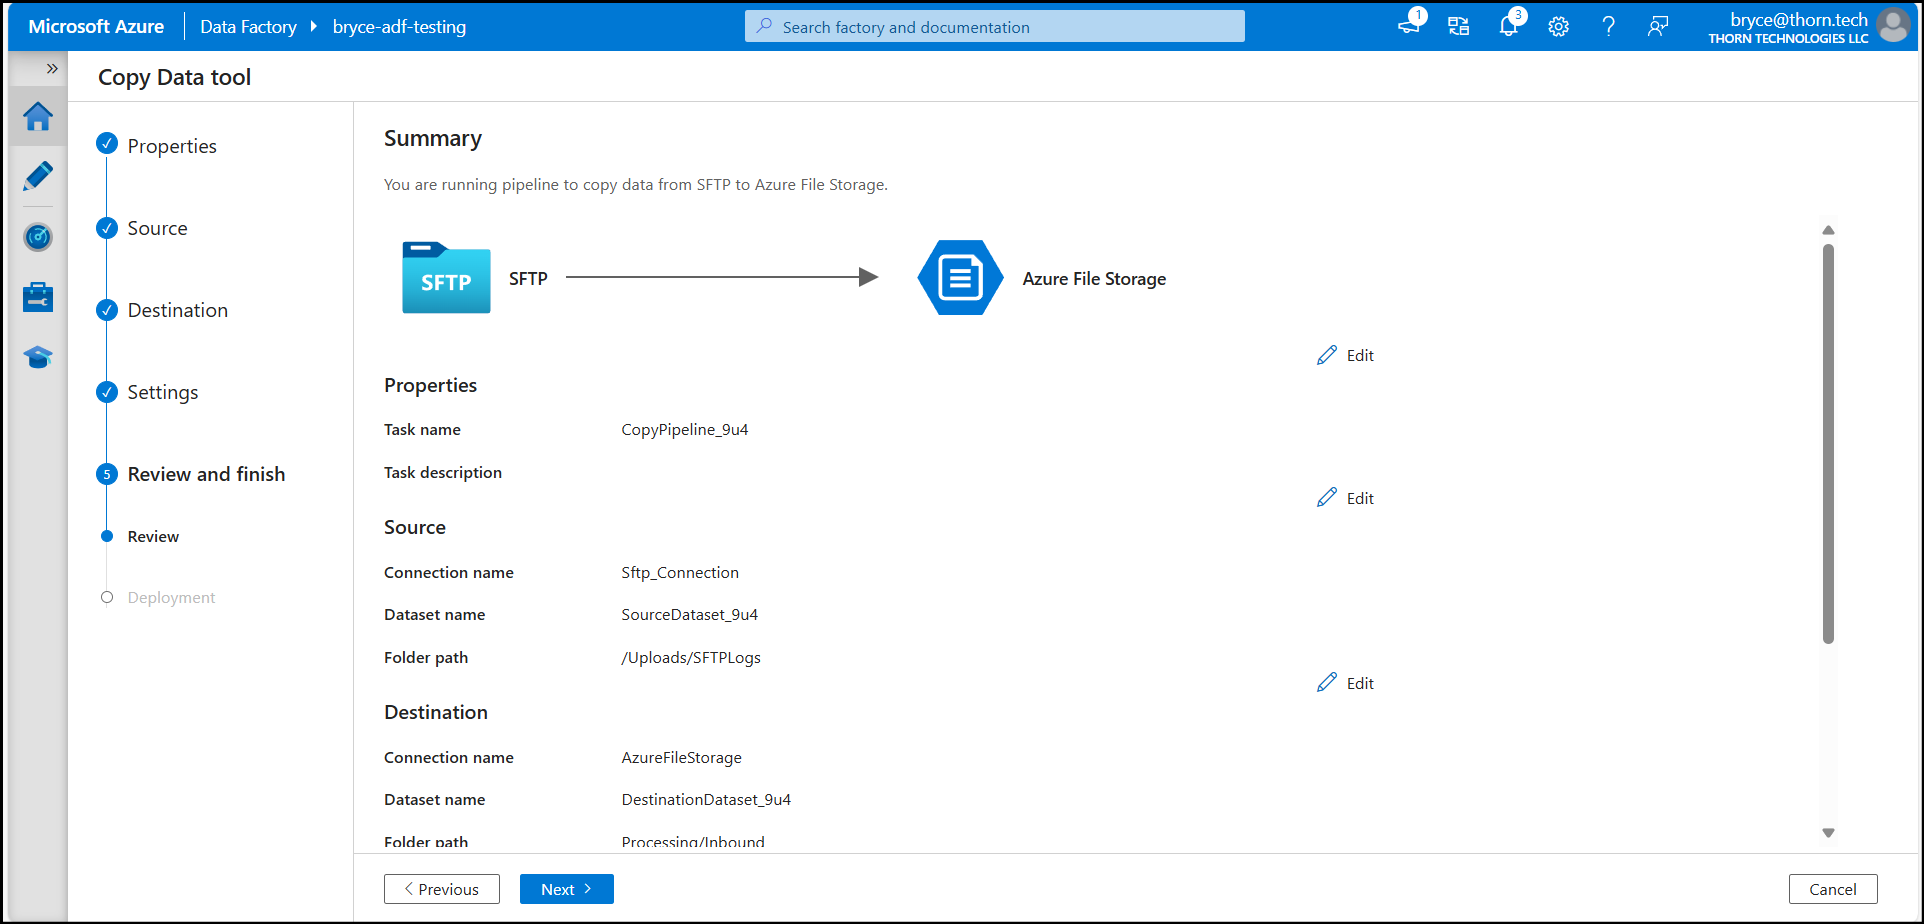
- Review the Summary and if everything looks correct, click Next to run the pipeline.

- Finally, after viewing the deployment steps and their status and click Finish.

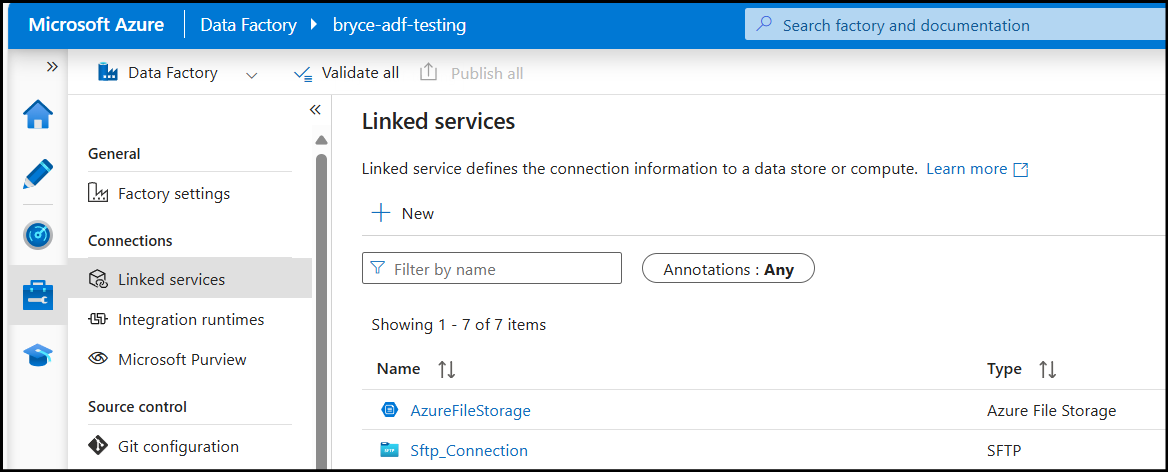
- You’ve now successfully created a connection to your SFTP server and Azure File Share which you can reuse in future pipelines. You can view these connections by going to Manage —> Linked services in your Azure Data Factory.


Looking for a solution to SFTP files to Azure, AWS, or Google Cloud? SFTP Gateway comes with a 30-day free trial on all three cloud marketplaces.
Ready for a technical deep dive? Download the free SFTP Gateway for the Enterprise white paper.